
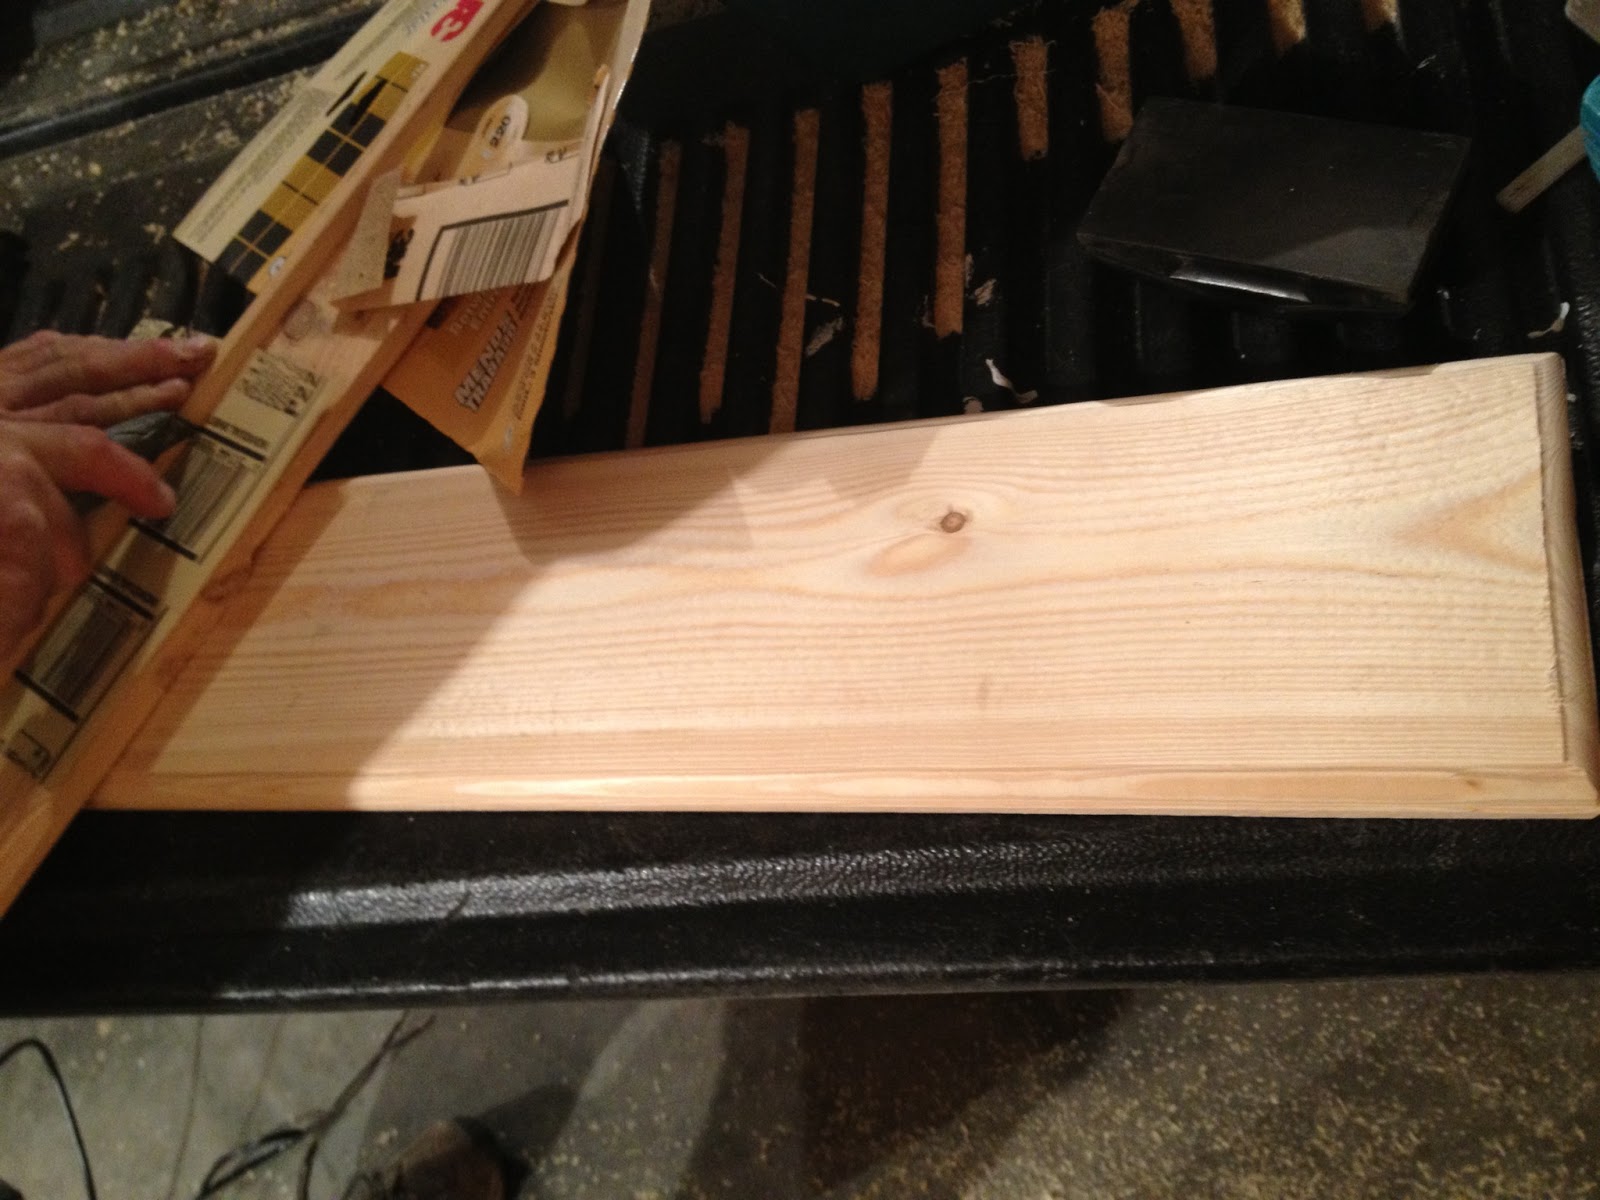
The first step was to find a board. I used a 1 X 8 that was approximately 30" long. It had some rough edges on the top and bottom so we cut about 1/2" off both sides to make the edges smooth. Next, I used a router to make the edges of the board more attractive. This is what the board looked like after routering.
I then sanded down the rough parts and used the electric sander to make the sure the face of the board was smooth. The next step was paint! I shopped for my paint at Hobby Lobby and used the awesome 40% coupon you can print off their website. I chose Anita's Acrylic Paint and bought the smaller bottles. These are the colors I used for the project.

I believe the bottles I bought cost somewhere around $.80 a piece! For the main board, I used Grey. This is what the board looked like after 1 coat of paint! I used two for the finished product.

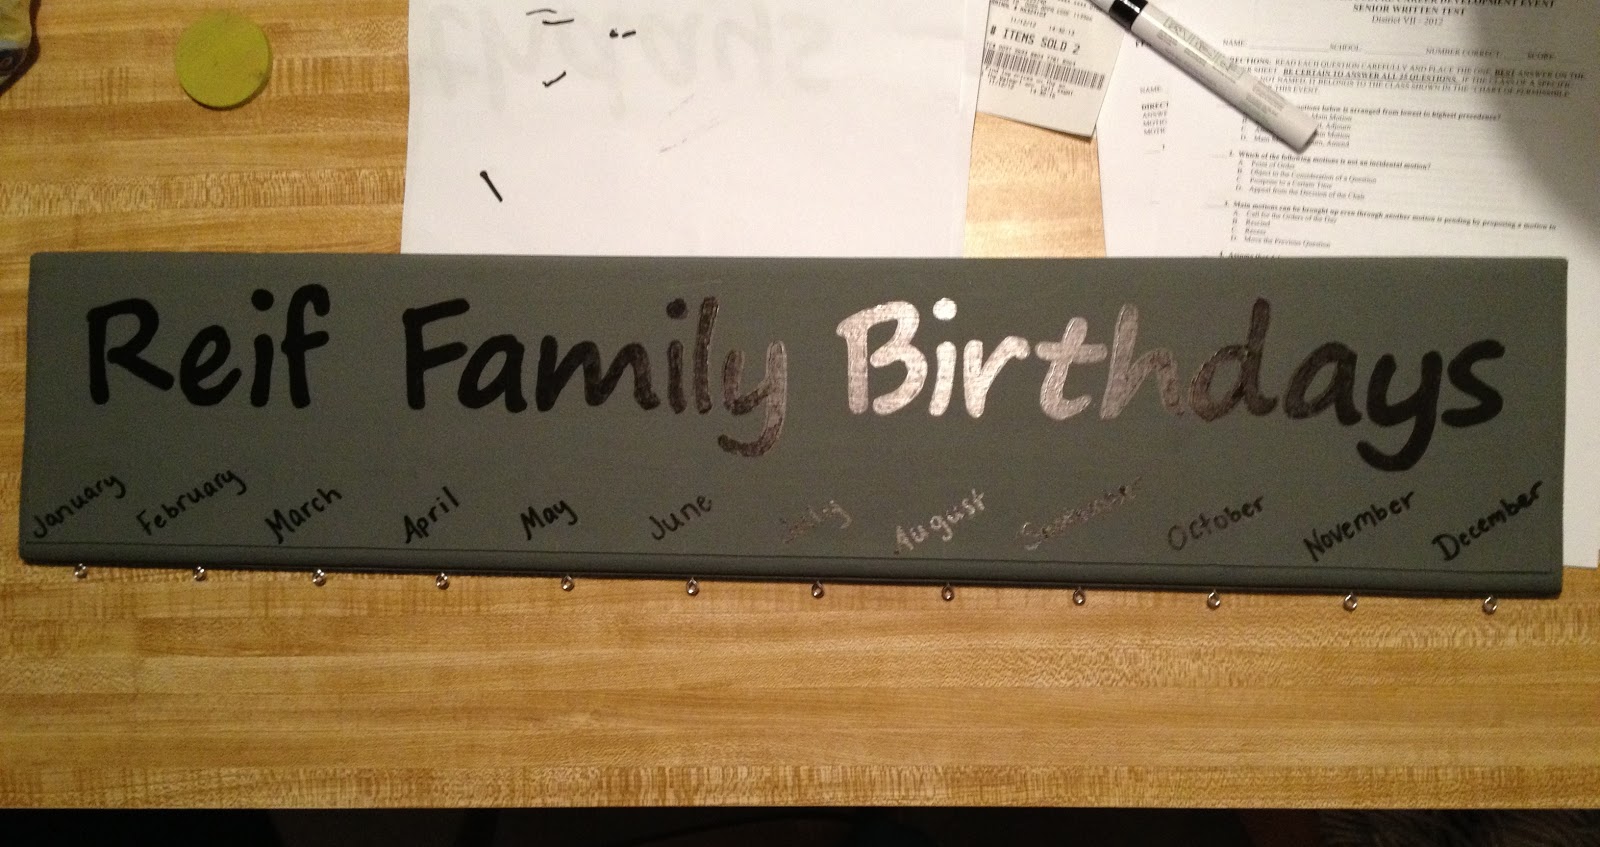
The next step was putting the words on the board. Since my board seemed so long and I didn't want to use a large stretched out font, I used the words "Reif Family Birthdays" on my sign. I used Microsoft Publisher to create a "banner" the size of my board. I then typed out the words and used the 'Segoe Print' font and adjusted the letters to the size I wanted. I believe my letters were approximately 2 1/2" tall and 30" total in length. I printed the sign off and cut out the letters to use as stencils. I lined the letters up on the sign and then traced them on with a pencil. This is what the letters looked like lined up on the board.


This is what the top board looked like complete!
While working on the main board, I also started working on the individual circles that hang from the board listing everyone in the family's birthdays. I also bought these wooden circles at Hobby Lobby. I first started with the "wooden nickels", but after completing the first step in the process and breaking a few, I then bought wider and thicker circles to use. These are what the circles I used look like and their packaging.

I marked the circles, and drilled a small hole in the top and bottom of the circles using a 1/16" drill bit. You must make sure the holes are directly above/below each other in order for them to hang correctly. After drilling the holes, I then painted the circles using the other colors I purchased. Each person in the family has their own circle and each family has their own color. So for example, my family has 4 people in it and our color I chose was pink. So I painted 4 of the circles pink. To be sure that the holes previously drilled stayed open, I used a push pin to remove the paint. These are what the circles look like in progress.


After the painting was complete, I used the eye-screws from earlier and put one in each the top and bottom of each circle, then I used the paint pen from earlier to write each person's name and the date of their birthday on the circle that is designated to them. For example mine would be (Alicia with a 12 below it or my dad's would be Scott with a 3 below it). These are what some of them look like complete!

It's finally done!!
Here is my finished product!!

it's really appreciable message for everybody thanks for sharing this information.
ReplyDeleteBirthday Lawn Signs